
Monetizing Appery.io apps with Pollfish surveys
We are thrilled to announce that you can now monetize your Appery.io apps with Pollfish Surveys.
Appery.io is a cloud platform that makes it fast and simple to build hybrid and mobile web apps that are connected to APIs. Pollfish pays up to 20x more than any traditional advertising format and can be integrated to Appery.io apps within a few minutes.
Integration Steps
1. Obtain a Developer Account at Pollfish
Register as a Publisher on Pollfish website
2. Add a new app on Pollfish panel and copy the given API Key
Login on Pollfish website and add a new app on Pollfish Developer Dashboard in section My Apps and copy the given API key for this app in order to use it later on in your init function in your app.
3. Download Pollfish plugin
Go at Pollfish Cordova Plugin page on GitHub and download it, as a zip file.
4. Uploading Pollfish Plugin to Appery.io
As described on Appery.io Custom Plugin’s Documentation page you need to upload Pollfish plugin to Appery.io platform from the relevant section.
- From the platform main dashboard (not in the App Builder), go to Resources > Cordova Plugins.
- Click Import Cordova plugin.
- Click Choose file and upload Pollfish plugin file you downloaded in previous step.
- Click Import plugin. The plugin will appear under Cordova plugins.
5. Enabling Pollfish Plugin in your app
The Pollfish plugin just uploaded is available to any app. Before it can be used in an app, user needs to add it first to the plugins used from that app.
- Inside an app go to App settings > Cordova plugins > Imported Cordova plugins.
- To enable Pollfish plugin for the current app, check the box for the plugin.
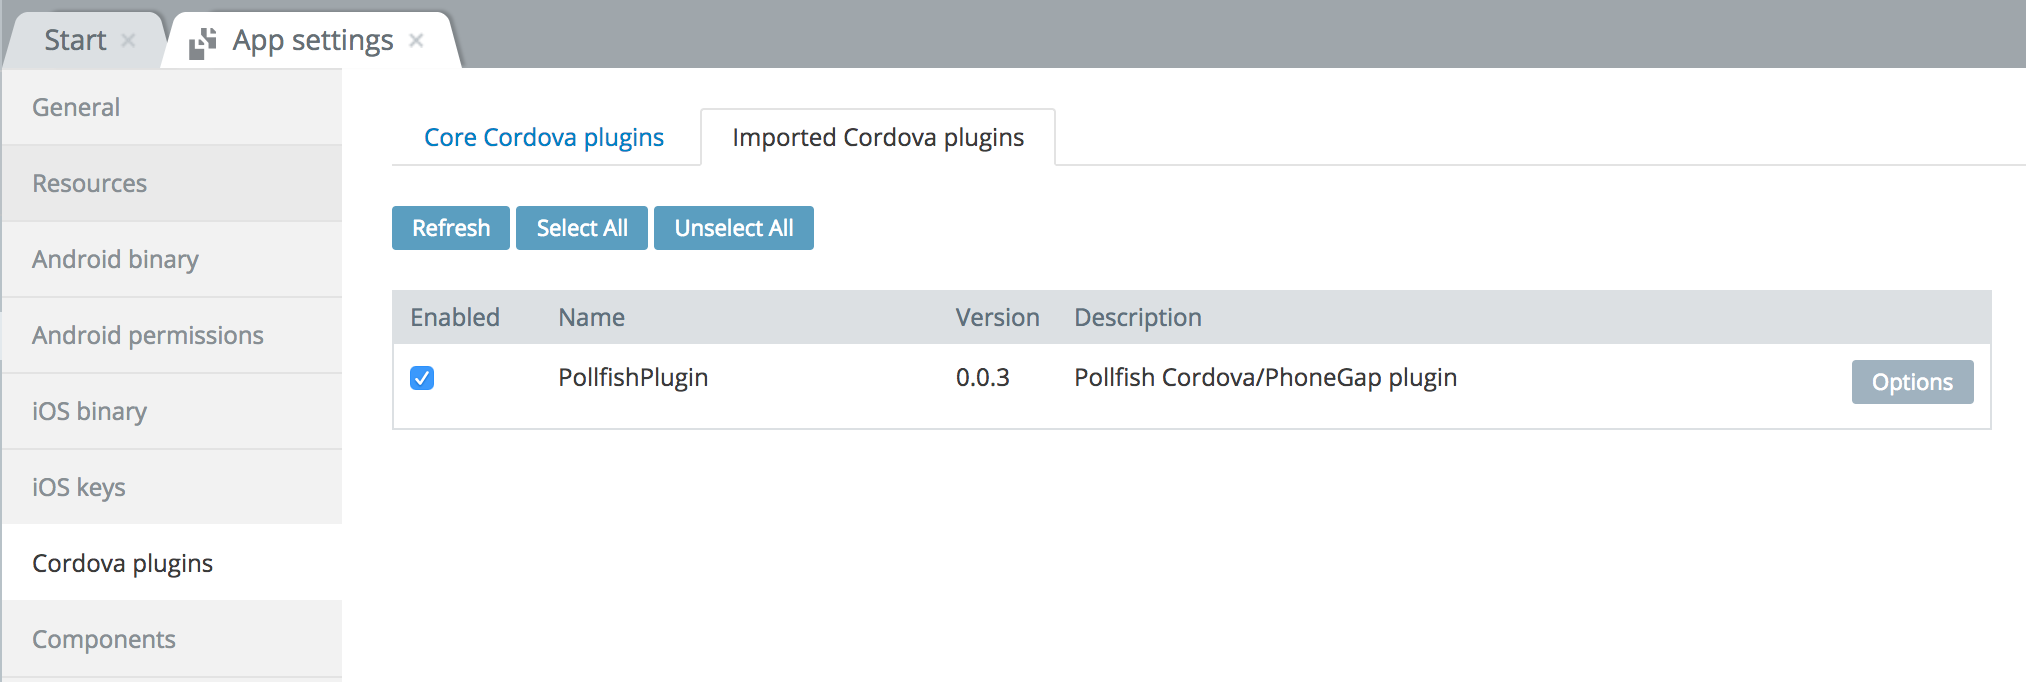
That’s the entire configuration you need to do to get access at Pollfish plugin in an app.
6. Showing Pollfish surveys in your app
In order to show Pollfish surveys within your app you just have to visit the screen where you want to show Pollfish surveys and place the following code in the SCOPE section/tab in the init() scope function.
init function takes the following parameters:
- debugMode: – Choose Debug or Release Mode
- customMode: – Init or custom init
- api_key: – Your API Key (from step 2)
- pos: – The Position where you wish to place the Pollfish indicator. There are four different options {pollfishplugin.Position.TOP_LEFT, pollfishplugin.Position.BOTTOM_LEFT, pollfishplugin.Position.MIDDLE_LEFT, pollfishplugin.Position.TOP_RIGHT, pollfishplugin.Position.BOTTOM_RIGHT, pollfishplugin.Position.MIDDLE_RIGHT}
- 5.padding: – The padding (in dp) from top or bottom according to Position of the indicator specified before (0 is the default value – |*if used in MIDDLE position, padding is calculating from top).
You can read more on the available options for initializing Pollfish here.
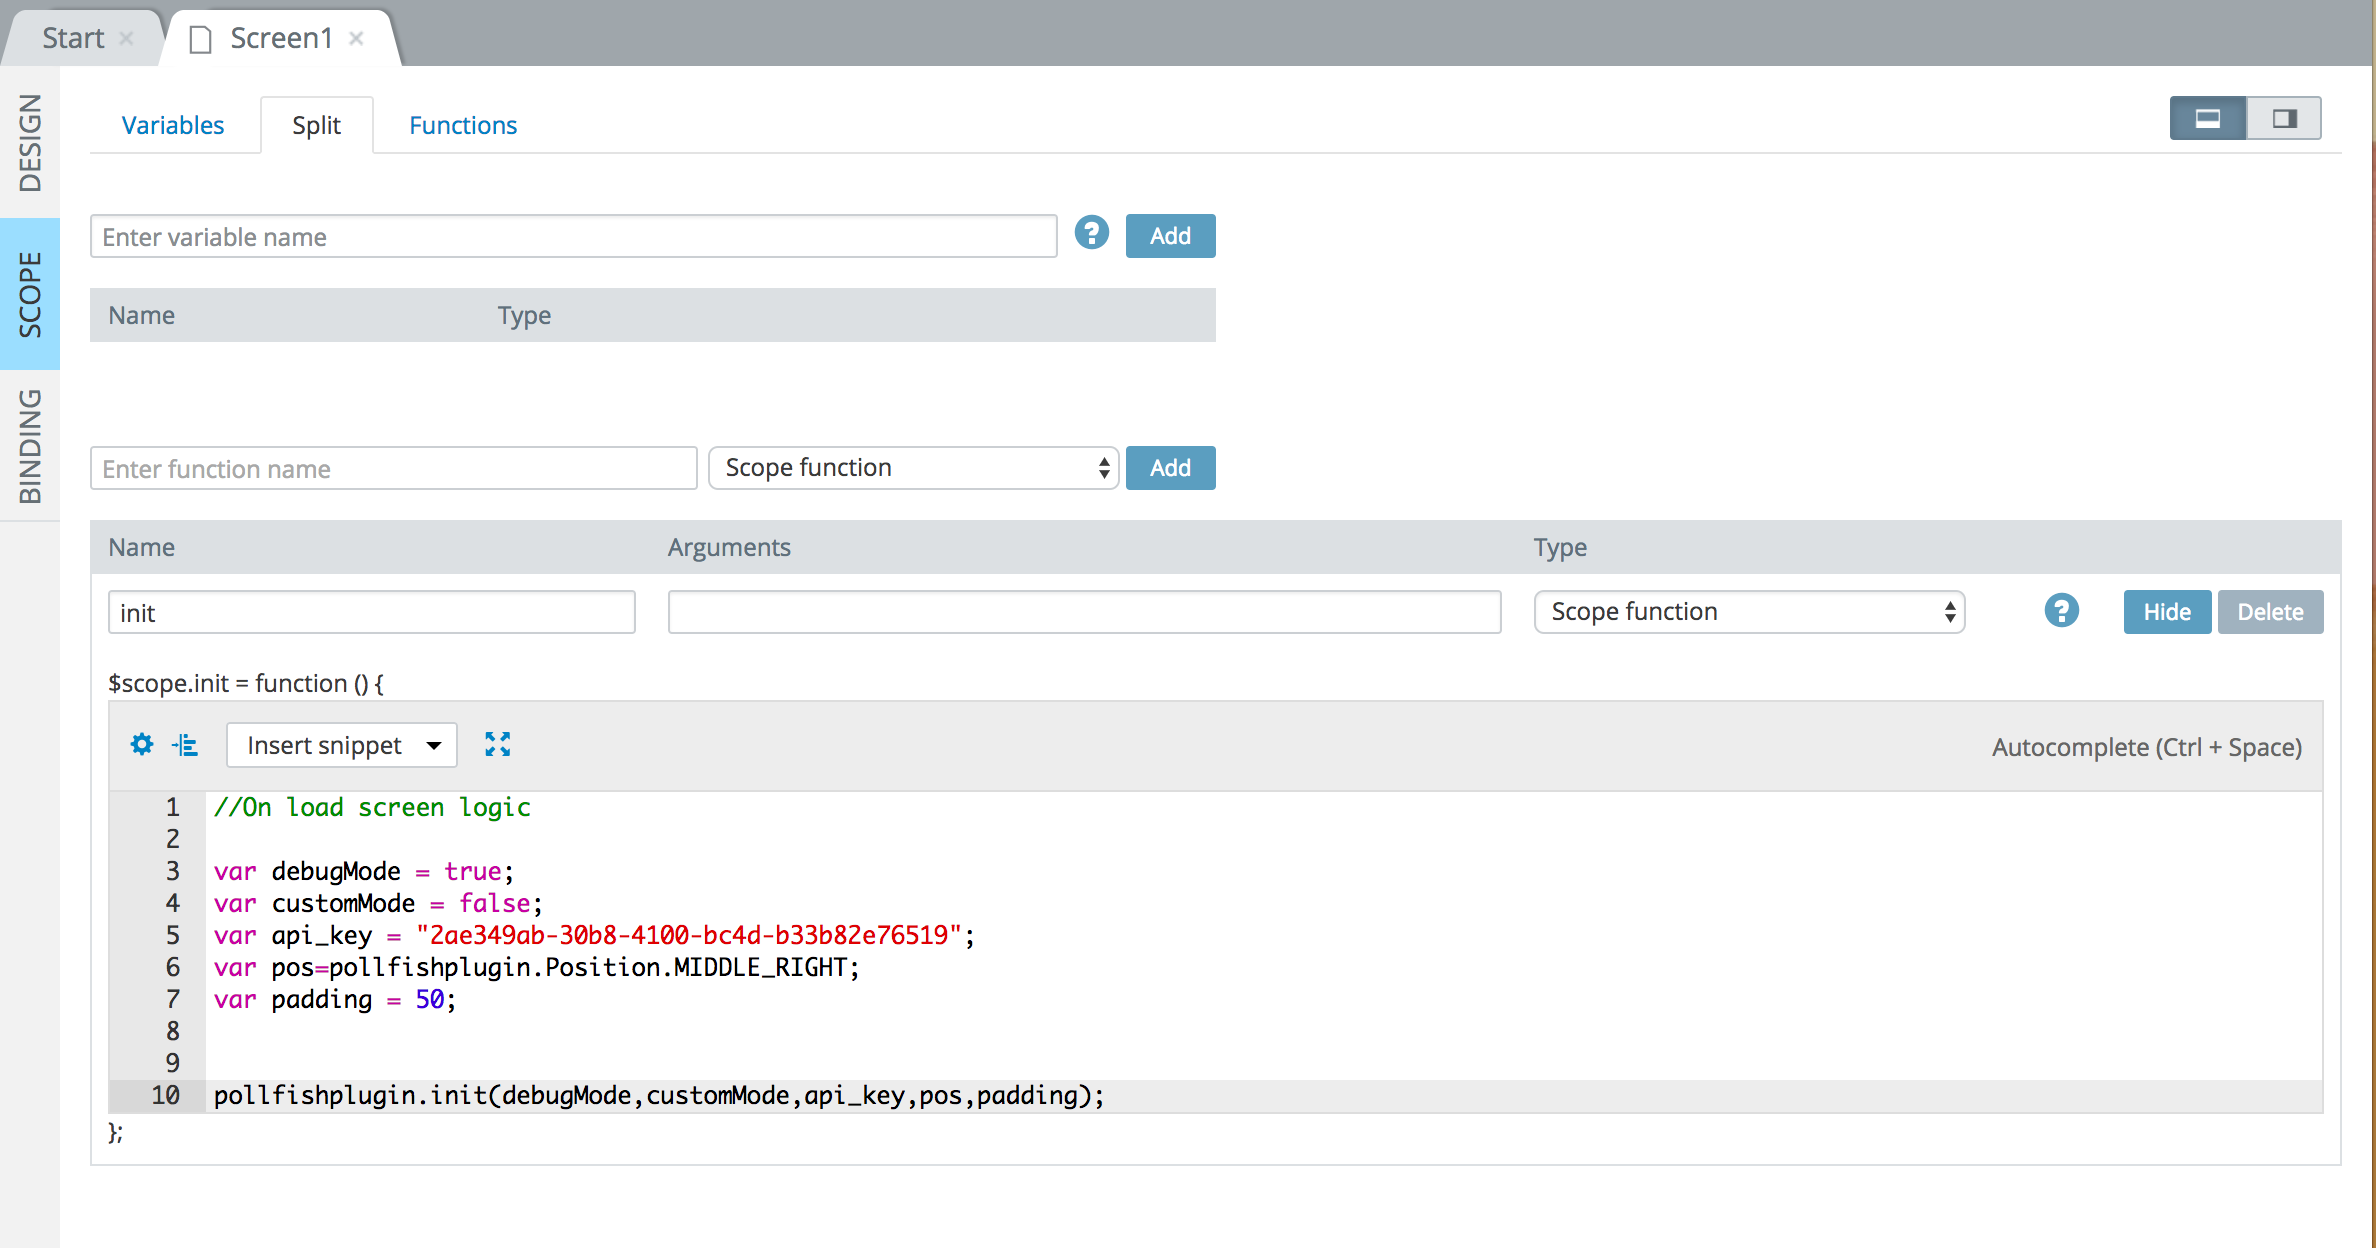
Initiliazation example:
var debugMode = true;
 var customMode = false;
 var api_key = "YOUR_API_KEY";
 var pos=pollfishplugin.Position.TOP_LEFT;
 var padding = 50;
pollfishplugin.init(debugMode,customMode,api_key,pos,padding);
You can see Pollfish test surveys in debug mode true.
7. Release app to store – Start making money
When you are ready to release your app with Pollfish surveys, just turn Pollfish to debugMode=false and upload your app to an app store in order to start receiving paid surveys from Pollfish clients.
If you have any questions please feel free to reach out at support@pollfish.com